Now that I showed you our wintery
pizza oven mantel decor on my last
post, it is time to make some pizzas.
Yum! We decided to switch our usual
make your own pizza party up and do breakfast
pizzas.
The dough has already risen once,
and the balls are shaped and have
risen for about 45 minutes when it is time
to eat. These are just after they have
been shaped. They are going to get nice
and puffy. I usually build the fire about
2 1/2 hours before eating is to begin.
Then I make the dough in my Bosch mixer,
let it rise and then shape.
The pizza ingredients are a lot simpler
for breakfast pizzas.
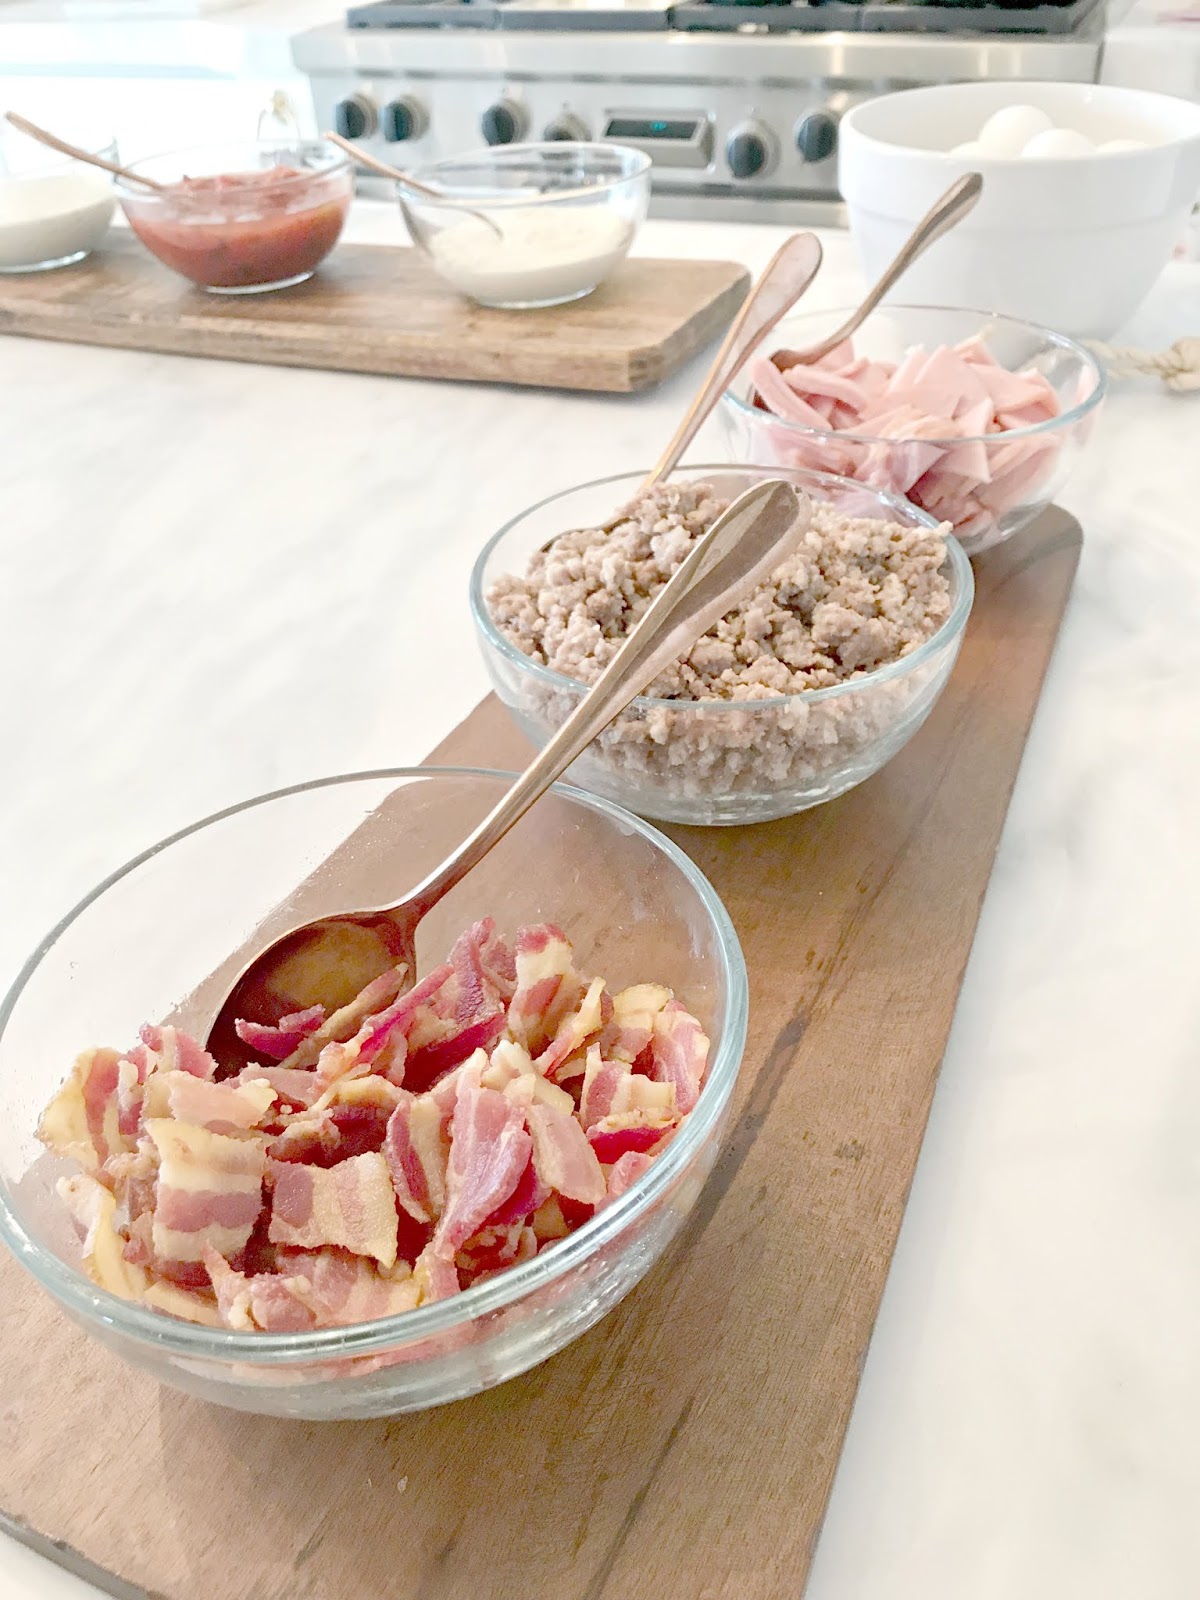
Toppings are cooked bacon, cooked maple
sausage and Canadian bacon.
The sauces are Alfredo sauce, Salsa, Ranch dressing
and Country Gravy.
Country Gravy turned out to be the big hit.
A lot of people made theirs and then topped
it with salsa.
I scrambled up 36 eggs, but also placed some
fresh ones on the table in case anyone wanted to
crack an egg on top.
Only two cheese were served, shredded cheddar
and shredded mozzarella.
Wow so much easier with so few ingredients.
Everyone rolls their own dough and chooses
their toppings.
Then they deliver it to the pizza
oven to be cooked. Of course you can do the
exact same thing in your own oven and on a
pizza stone. We did it that way for years.
Just be sure that you really do heat the pizza
stone at 550 degrees for at least an hour
before you bake it. That creates the crisp crust.
See the layers of sauce (country gravy), scrambled
eggs, meats and cheeses.
We did this for a brunch after a meeting with
our Young Single Adult Leaders and fed
about 22 of them. Some said they were
their favorite pizzas they have made at our
house, and we have had them over many times,
but never for breakfast ones.
Pizza Dough Recipe
(Recipe from Mugnaini Ovens, they said not
to use oil or sugar as that makes the dough
burn more easily.)
2 T. yeast hydrated in 3/4 C. warm water
12 C. all-purpose flour
1 T salt
4 1/2 C. additional warm water
Hydrate the yeast for about 5 minutes, then
place it, flour and salt in bottom of your
mixing bowl. Add the additional water.
Knead on medium low for about 5 minutes.
Turn out into a large bowl sprayed with
Pam, spray top of dough with more Pam
and cover with plastic wrap. Let raise
for about 1 hour. Punch down.
Shape into balls. This will make about 20 balls.
Spray baking sheet or proof box with Pam and
place balls in to raise. Cover with plastic
wrap or proofing box lid. Let raise about
45 minutes.
To shape pizzas, remove a ball and gently press
around edge keeping about 1/2 inch lip for
your crust edge. Lift up and gently stretch into
a round. Let the weight of the dough do the
stretching to avoid tears. The larger you stretch
it the thinner the dough.
Top with sauce of your choice, toppings
and then cheese. Bake in pizza oven or
oven. In pizza oven you will have it back
close to the fire, and you need a log burning
with a flame to melt the cheese. Turn the
pizza several times to even brown the crust.
In the oven, just leave in place, but be sure
you heated up your pizza stone.
Pizza Oven Tips
A lot more people are building pizza ovens.
My daughter just finished her new house and
she installed a pizza oven inside. Be sure to
season your pizza oven as directed by the
manufacturer before you begin making pizzas.
It usually is a several day process of small fires,
building up to a big fire.
Clear out any old ashes using your
long handled pizza peel
Build a fire, log cabin style by placing
2 double split hard wood logs (fruit or oak)
down and then two going across, and then
one on top. The logs have to be close enough
to each other to catch fire, but far enough
to let the air circulate. Use a firestarter
to start the fire. I like the Diamond Strike
A Fire (at grocery store) or Weber Lighter Cubes
(online or during BBQ season I have found at
Home Depot).
Watch to make sure the fire starts well.
After the flame is roaring, use your metal
pizza peel to carefully push the fire back
to the middle of the oven. You want to heat
the middle floor of the oven. At about 1/2 hour,
check to make sure the fire is still burning and
then add another piece of wood. This really
takes very little wood when you think that
the wood is double split, or each piece is
a quarter of a log. (We get our wood from
a nursery that sells wood. We actually saw
them delivering to Carrabas and contacted them.
A load will last us about a year.)
Now is when I make the dough so they
are both finished about the same time.
You can use the door at an angle to
create a draft to help the fire get going.
Check every half hour and add another
piece of wood to keep the fire going. See
how the flame spread up and over the round
pizza top. By the time the oven is heated, that
area will turn ash white.
(Long handled pizza peel for handling the pizzas in the oven,
wire brush for cleaning the floor of the oven, and proofing
box.)
About 15 minutes before you are going to
begin baking pizzas, push the coals to the back
of the oven and brush the floor clean with a metal
pizza oven brush. Add another piece of wood so
that you have a flame for melting the cheese.
We place the pizzas across the back, in
front of the fire, although at our class in
Italy they had us push the fire to the side and
place them front to back - that was too difficult
to manage that back pizza.
Add a piece of wood as needed to keep a flame
On occasion we have made the oven too hot
on the floor and the first pizzas burned. I just
got an old dish towel damp and placed it
over my metal brush and gave the floor a
quick wipe. It cooled it down enough without
being too wet or cold to cause damage to
the stone on the bottom of the floor.
No clean up is necessary, just close the door
and let the fire burn anything out that
got on the stone. Remove the ashes before
next use. Don't remove hot ashes without
having a metal container and a safe
place for them, so they don't start a fire.
If we are making dessert pizzas we leave them
closer to the front as the sugar burns quicker.
You can also bake bread on the hot stone,
just keep turning the loaf. You can cook a
casserole, again turning it once in a while.
You can pull the hot coals forward and
grill if you have the grill accessory.
You can bake a turkey in the oven.
You can slow cook a roast overnight, but we
found it was better to have it frozen so as
to not overcook it.
With a larger flame, you can broil. It really
can do just about anything, not just pizzas.
This was Hubby's creation. He likes
to make two different kinds per pizza -
kind of a half and half.
He always likes to finish the meals with
a dessert pizza. This one was a S'Mores
pizza with a sprinkling of cinnamon sugar!
He generally cooks a few and brings around
a bit for those that want to indulge, since a
whole dessert pizza might be too much for them.
Really, your imagination is the limit on
make your own pizza parties.
I will be posting with