Showing posts with label Chicken. Show all posts

Monday, September 30, 2013

Chilaquiles with Chicken and Roasted Tomatillo Salsa


Chilaquiles are popular breakfast food
in Mexico, but we like them for a quick
dinner.

They originated as a leftover dish using up
the stale tortillas and leftover red or green
sauce, meat and cheese.  Sometimes they
have scrambled eggs on top for a 
breakfast dish.  Our favorite is
with green sauce and chicken then topped
with cheese.


I chose to fry my own corn tortillas but we have made
them with tortilla chips when we were in a hurry.

I also made my own salsa verde but you can use
a bottled or canned variety too.


The tortillas are topped with the salsa and chicken
and then cheese is added and melted on top.

You can cook your finished chips in the salsa verde but
I like to keep mine crispier so I just top them with the salsa.

Chilaquiles with Chicken and 
Roasted Tomatillo Salsa

1 dozen corn tortillas cut into strips or triangles
oil for frying tortillas or tortilla chips

2 C. cooked chicken, cubed
salsa verde (homemade recipe follows or
we like World Table Salsa Verde from Wal Mart 
or Herdez Salsa Verde)
3 C. monterey jack cheese

Fry the corn tortillas in oil brought to 350 degrees in
small batches until crisp.  Drain on paper towels

Layer the chips, salsa verde, and chicken and top
with lots of cheese on an ovenproof or microwave proof
dish.  Drizzle a little additional
salsa verde on top.  Heat until the cheese is melted
in a 350 degree oven or in the microwave.

Dig in and enjoy.

Roasted Tomatillo Salsa
1 1/2 C. fresh tomatillos, rinsed
2 cloves garlic
1 jalapeno chile, seeded
1 1/2 tsp. chicken bouillon powder
3/4 C. water
1 medium white onion, chopped
1/2 bunch cilantro, chopped

Place cleaned, chopped tomatillos, garlic and
seeded jalapenos in a large skillet.  Cook over
medium high heat until tomatillos are blackened
and soft.  Do not use oil.  Remove and let cool
a few minutes.  

Place the water, bouillon and the chopped onion
in a saucepan and cook until the
onions are soft. Remove and let cool a few minutes.
Place the tomatillo
mix and the onion mix in the food processor
with the cilantro and puree.
Transfer the salsa to a saucepan and
bring to a 
boil and simmer until a nice salsa consistency. 
 Best if refrigerated for
about 3 hours, but it is great right away.

Makes about 1 quart

This salsa verde has a great fresh tangy
flavor.  We loved it.
a cookbook printed in 2005 that was left in 
our Cabo home for me to inherit - fabulous. You can 
buy it from Amazon.  Everything we have made in it is great.)


Don't miss out on this traditional Mexican favorite.
It is super quick if you use tortilla chips
and canned salsa verde.  I really like Wal Mart's
World Table (my favorite) or Herdez's Salsa Verde.
You can have it with or without chicken and you
can also serve it with scrambled egg, but this is
our favorite way to serve it.


Tuesday, September 17, 2013

Lemon Basil Chicken Salad


If you are like me the basil is at it's peak and
just screaming to be used in so many recipes!

This wonderfully refreshing chicken salad
is perfect for using that basil in.


Basil has to be one of my favorites.  Wish it could winter over
but last year I did cut a sprig off and put it in a cup of
water.  It sprouted and we had fresh basil in the kitchen
until Christmas.


The flavors of lemon and basil are wonderful together


and everything is accentuated by the punch of 
toasted almonds.  I ate way too much of this!

Lemon Basil Chicken Salad

3 C. cubed grilled chicken
3/4 C. mayonaise
1/4 C. sour cream
1/2 C. fresh basil (measure without cutting up the leaves)
1 T. fresh lemon juice
1/2 tsp. salt
1 stalk celery, finely diced
1/2 C. toasted slivered almonds

Place the mayo, sour cream, fresh basil and lemon juice
in the bowl of your food processor and pulse until the
basil is finely minced.  Place that in a large bowl and
stir in the cubed chicken, celery, toasted almonds and 
salt.  Stir to blend.  Cover and refrigerate for at least
an hour for flavors to blend.  

Serve as is or on croissants for a sandwich.
This was so yummy as it is, that I couldn't
do anything but eat it with a fork and I
am going to have to make it again soon
while the basil is here!


I do like that in our market you can buy fresh basil in a little
potted plant during the winter months, but try this out
now when you have your own basil.


Tuesday, September 3, 2013

Rosemary Chicken Skewers with Tomato Bruschetta


Tender chicken marinated and grilled
infused with the flavor of fresh rosemary
is the perfect end of summer main dish.

Top it with a bruschetta sauce using
a combination of your fresh garden 
tomatoes and your fresh
and you have created the
perfect harvest meal.


If you are like me, your rosemary has 
happily grown into long strong
sprigs that can be stripped of their
leaves as used as skewers for
grilling meat.

You can't imagine the flavor that using the
rosemary for the skewers infuses into the meat.
This is a WOW dish and it will make you
so proud of your gardening skills.


The chicken is cubed and marinated in a
rosemary flavored marinade so
you get the fabulous flavor on the
inside and the outside of the meat.


Pop some crusty bread on the grill and 
use that as the base for serving your chicken skewers
and your bruschetta sauce.  This is one of those
dishes where you will be saying "Mmmmm..." with 
every luscious bite.

Rosemary Chicken Skewers

6 large strong fresh rosemary sprigs (8-10 inches)
6 boneless, skinless chicken breasts

Marinade

1/2 C. olive oil
2 T. balsamic vinegar
1/2 tsp. salt
1 tsp. dijon mustard
1 T. finely chopped fresh rosemary
1/4 tsp. ground black pepper

Bruschetta
crusty bread, sliced
olive oil
fresh garlic

 Tomato Bruschetta Topping

3 C. chopped mixed tomatoes (I love to add the yellow, but
if you don't have any, just use red)
2 cloves fresh garlic, crushed
1/2 C. finely chopped fresh basil
1/4 C. olive oil
1 tsp. salt
1 T. balsamic vinegar
a few grinds fresh pepper

Make the Tomato Bruschetta Topping by
gently mixing the ingredients together and set aside.

Cube the raw chicken.  Strip the leaves off the 
rosemary sprigs leaving the leaves on the top one inch.
Thread the chicken onto the skewer and place in a deep
baking pan.  
Whisk together the marinade ingredients and brush
on the skewers.  Cover and refrigerate for 30 minutes
to one hour.  Remove from fridge and heat the grill.

While the grill is heating brush the crusty bread
with olive oil.

Grill the chicken.  When the chicken is almost
done, grill the bread alongside of it.  When the
bread is done rub it with the fresh garlic clove.

To serve, place the toasted bread on the plate, top 
with the chicken skewer and then finish with
the Tomato Bruschetta  sauce.

Serve with parmesan if desired.


What a great, fresh harvest meal
using your rosemary, tomatoes and basil.

If you are lucky enough to live in a place where the
rosemary doesn't freeze, you can make this year round.

We have successfully dug up our rosemary plants
and kept them alive in the kitchen all winter,
but here in Utah they won't winter over.


Monday, August 6, 2012

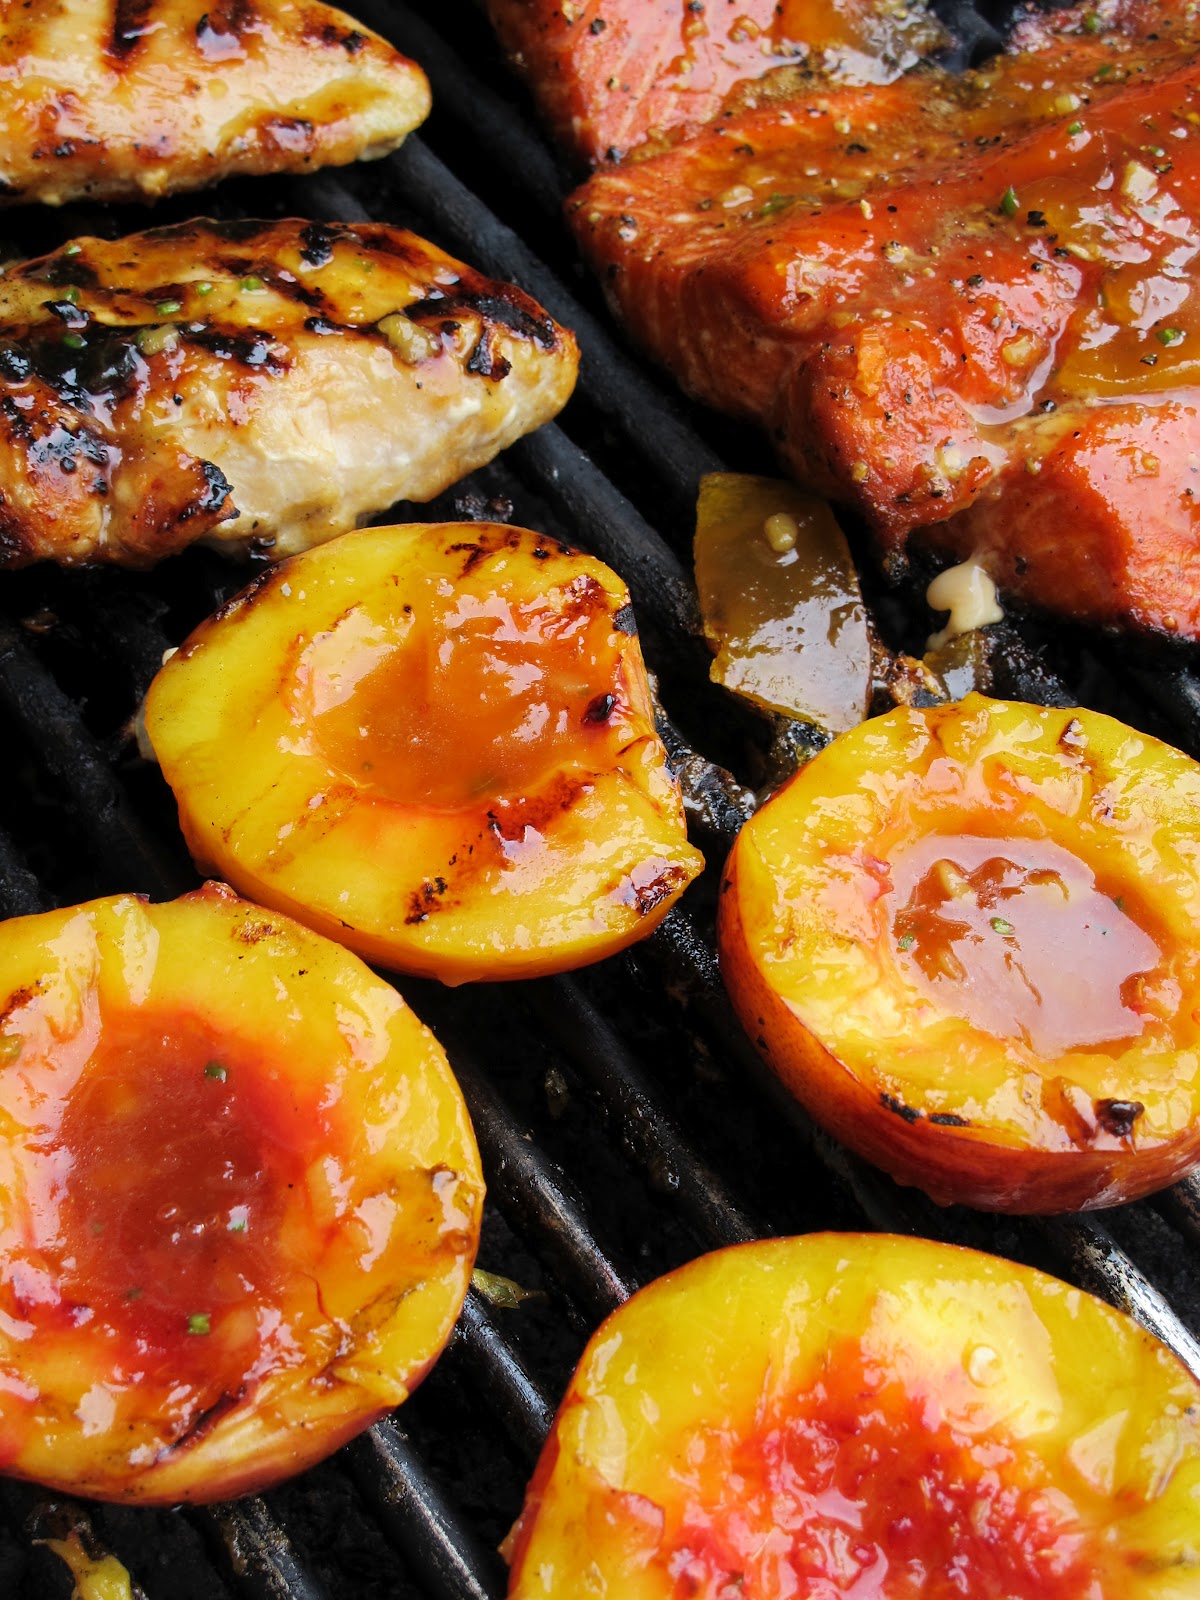
Spicy Grilled Salmon or Chicken with Grilled Peaches


When a main dish makes you want to sing between bites 
you know it is one you have to get the recipe for and 
this Bobby Flay Recipe certainly makes me want to 
sing!


My friend Tammy introduced me to this recipe on our 

I told you we loved to eat really well at Lake Powell.


Everyone was anxious for her to email the recipe.
Our friend Wally had just brought us over some
Red Sockeye Salmon that he had caught in Alaska.
I decided to make the recipe and try it on both the
salmon and the chicken.


It is one of those fabulous recipes that is so full of flavor, but so 
easy to make.  I have seen grilled peaches for ages but have never
made them - don't put it off - give it a try this week!!

Spicy Grilled Chicken or Salmon with Grilled Peaches
(Slight adaptation of Bobby Flay's 

2 C. peach preserves
1 T. finely chopped garlic
3 T. olive oil
2 T. soy sauce
1 T. Dijon mustard
1 small jalapeno or serrano chili finely chopped

boneless chicken breasts or salmon filets
fresh peach halves - one per person
toasted, chopped pecans

Marinade
1/3 C. soy sauce
1/3 C. vegetable oil
1/3 C. maple syrup
1 clove garlic, crushed

Mix the marinade and marinate the meat for 30 minutes. 
( I changed the recipe and added the marinade.)

Meanwhile prepare the spicy peach sauce by mixing 
all of the ingredients together.

Heat grill.  Grill chicken or salmon about 5 minutes per side.
Brush peach glaze on both sides and continue to grill until
done.

Brush the cut side of the peach halves with the peach glaze
and place cut side down on grill for about 2 minutes.  Turn
over and spoon more glaze onto cut side.  Cook about 3-4 
minutes more or until soft.  

Serve the meat with additional glaze poured over
and the grilled peaches.  Top both with toasted pecans.
(I added the pecans too.  They give a nice nutty crunch.)


Even my non-fish lovers gobbled down the salmon.  It was the reddest
salmon I had ever seen and was perfect with the glaze, peaches and pecans.


The peaches would be fabulous as a side dish too.


This is me rappelling down a cliff at Lake Powell.
The first step off the top is the scariest.
We work up a big appetite here and it is fun to
have such great food.  So glad Tammy introduced us
to this great recipe.

I will be posting with
Foodie Friday
On The Menu Monday


Monday, May 21, 2012

Yummy Crockpot Nachos


This is a staple at my daughter's home - especially if she is having
a large crowd over.  The chicken slowly cooks in the crockpot
and at the end salsa, corn, beans, cream cheese and cheese are
added to make a one pot meal.  


I made this when her 7 year old daughter was over and as I put it
together to take a photo she promptly told me I was doing it wrong -
that they just serve the chips on the side of the dip.  I told her
everyone could do it the way they wanted, so we set up a 
make your own nacho bar with chips, the chicken dip, salsa,
additional cheese, guacamole, ranch dressing, limes and cilantro
on the side.  Of course she just had the chips and dip - separately!


It may not look like much, but the flavor is great.

Crockpot Chicken Nachos

5-6 boneless, skinless chicken breasts (can be frozen)
1/2 C. brown sugar
1 can corn kernels, drained
1 can black or kidney beans, drained
2 C. salsa
8 oz. cream cheese, cubed
1 C. grated cheddar cheese or Mexican blend cheese

Place chicken and brown sugar in crockpot and
cook on high for 3-4 hours (if frozen) less if thawed
or until chicken shreds easily.  Add remaining ingredients
and heat through for 15-20 minutes making sure that
the cream cheese blends in.

SERVE AS DESIRED
(or as instructed by your resident expert!)

Set out desired ingredients and let everyone create
their own personalized nachos.


Posting with

Saturday, March 3, 2012

Country Club Chicken


Oh YUM!
This savory smothered chicken is absolutely
KILLER!


Yup another Pinterest HIT for Pinterest Week.

Well, let's be honest, with tablescaping and
other post, I really made this into more than a week -
but I have been having sooooo much fun!

I have to admit not everything I have tried
has been a hit, but this one is ridiculously delish!

This recipe comes from Kayotic Kitchen
and she says that this is an old recipe from 
community and church cookbooks.  I hadn't ever
had it so maybe you haven't either, but put it on
your to die for, I mean to do list!


First you are going to lightly brown your seasoned chicken
breasts in a frying pan that you crisped your bacon in.


Then in that same pan you will cook up your mushrooms
and onions, which will soak up all the fabulous flavor.


This next step threw me a little - you are going to add
Campbell's Cream of Mushroom Soup 
(Oh, no, I don't want this to taste like Mom's old
Cream of Mushroom casseroles!  Don't worry -
it doesn't taste like them at all!)

The sauce is finished off with white cheddar
and the crumbled bacon.  Everything tops the
chicken and pops into the oven to finish baking.

Country Club Chicken Recipe
(lightly tweaked)

6 slices bacon ( I used the precooked from Costco)
1 T. butter
4 boneless, skinless chicken breasts
salt and pepper
1 large onion
8 oz. mushrooms
1 T. white wine vinegar
3 T. water
2 cans Campbells' Cream of Mushroom Soup
2/3 C. white cheddar
 (mine was white cheddar with cracked pepper)
(Yes, I did omit the apple on purpose - just didn't
sound good to me.)
1 lb. spaghetti

Cook the bacon in the frying pan.  Even with the Costco
precooked bacon I was able to get a little bacon grease
in the bottom of the pan.  Remove the bacon, let cool and crumble it.
Save
about 1 T. of the grease.  Add the butter, more as less
as needed.  Season the chicken with salt and pepper and
then brown on each side.

Remove the chicken to a baking dish.  Add the onion
and the mushroom and cook until soft.  Stir in the vinegar, 
water and the soup.  Heat through.  Add the cheese and stir
until melted.  Stir in the bacon.  Spoon the mushroom sauce over the
chicken until as she says, "...you can hear them scream
'Help me, I'm drowning!" (She really is very funny!)

Bake at 350 for 25-30 minutes or until the chicken
is baked through and the sauce is bubbling.

Meanwhile bring a large pot of water to boil
for the spaghetti.  Season it with salt and cook
the spaghetti according to package directions.  Drain.

Serve over spaghetti and 
garnish with additional slices of bacon
and fresh parsley.

I want you to know that I had this brilliant idea to go
out to the garden and dig under the snow to see if there
was any fresh parsley. 


 YUP there was! I should have thought of that before.
 How fun was that?
So this is featuring fresh parsley from my garden in the winter!!!


This one is make you weak at the knees YUM.
Definitely company worthy!

As a matter of fact - we loved it so much that I am going
to share with you another idea for this recipe -
SOON!

I will be posting this with

Friday, February 24, 2012

Bacon Wrapped Stuffed Chicken - Pinterest Week


It all started one week night when I was trying to
decide what to make for dinner.  I really love to
cook (but not clean up) but I don't love to decide
what we are having.  I decided to just open my
Pinterest Recipe Pantry and choose something.
This Bacon Wrapped Chicken caught my eye
and I had all of the ingredients - that was really important as I
had no intention of running to the store.


When I pound chicken, I place it in a plastic bag,
but not tightly sealed so that the bag doesn't pop
open.  Then I use my french rolling pin to evenly
pound the raw chicken thin.


The recipe called for garlic and chive cream cheese but since I only
had plain cream cheese, I decided to add my own 
flavorings so I chopped a little chives and added some
granulated garlic.


I found the recipe on Blogchef.net.  Bobby is the author of
Blog Chef and there are so many yummy
comfort food recipes on this site.  Go give it a try.

Bacon Wrapped Stuffed Chicken

6 boneless skinless chicken breast pieces
(pounded thinly)
8 oz. cream cheese
2-3 T. finely chopped chives
1/4 tsp. granulated garlic
12 pieces partially cooked bacon
(I used the precooked bacon from Costco)
I like to use the precooked or partially cooked
bacon so that the bacon still isn't raw when 
the chicken is done and I don't like wiggly bacon.

Preheat oven to 400 degrees.  
In a medium bowl mix the cream cheese,
chives and garlic. 

Spread the thinly pounded 
chicken breasts with the cream cheese mix.

Roll the chicken breasts up from the narrow end
and set aside.  
Place the precooked bacon on a plate covered
with a paper towel.  Top with another paper towel and heat
in the microwave for 1 minute to soften the bacon.
Now wrap the bacon around the chicken.
Secure with toothpicks.

Season with a little sea salt and freshly ground pepper.

Bake at 400 for
about 20-25 minutes or until the juices run clear.


(This is the uncooked chicken.  See how the precooked bacon
is already brown and mostly cooked?  You will to just warm 
it up a little in the microwave so it will be flexible enough to
wrap around the chicken.)


Oh, when you slice it open, you get the creamy
goodness of the cream cheese and the salty crunchiness
of the bacon in each savory bite.  Definitely a keeper!
This was delicious and simple and is certainly
company worthy.

I have a lot of people tell me they don't like recipes
they have tried on Pinterest.  I tell them that just 
because the picture looks great doesn't mean the
recipe is going to be great.  Sometimes you may want to
tweak the recipe a little to make it so you like it (like
using the precooked or partially cooked bacon) but 
we thought this recipe was great.

I will post this with 


Monday, August 29, 2011

Masaman Chicken Curry - It's Thai Tonight


Masman Chicken Curry, a Thai dish is
another new dish that the girls suggested 
for Girl's Camp.  Pretty exotic camping fare!
This was my first venture with Thai food
(besides spring rolls and pad thai).

Since I had never had it, I had to test it out
before we served to to 24 at Girl's Camp.

My 17 year old son and my 20 year old daughter
walked in on the test dish and it was an 
instant favorite.  I was a little nervous about
serving this to girls between ages 12 and 18
but they all loved it too.

Hope you enjoy it.


You may have to find a specialty store
featuring Thai foods to get a few
of the ingredients, but it is worth
the search.


Masaman Chicken Curry Recipe

2 T. vegetable oil
3 T. masaman curry paste (Thai store)
3 T. red curry paste
2 - 19 oz. cans coconut milk (much better
if you don't use light)
1 3/4 C. water
6 T. soy sauce
7 T. sugar
4 T. tamarind liquid (Thai store)
1 lb. cubed, cooked chicken (or tofu)
1 C. cut up carrots
1 red bell pepper, chopped
2 C. red potatoes, cubed with skins on
1/2 C. cashews, chopped

Jasmine or brown rice to serve it over

In a large pan heat the oil and stir fry the
curry pastes for a couple of minutes to bring
out the flavor.  Add the coconut milk and 
heat for a couple of minutes to blend flavors.
Add the water and remaining ingredients
except cashews. 

Simmer for 30-40 minutes or until potatoes
and carrots are soft.  If desired you can add
a little cornstarch mixed in cold water at 
the end to thicken up the sauce.

Serve over rice with the cashews.

You may stir the cashews in, but some people
don't like nuts, so we added them on top.


I had never had Masaman Curry before.  It has a very
mild, complex flavor and everyone loved it, even
our youngest girls.  

I will be posting this with


Follow me on Instagram